Showing posts with label Computer. Show all posts

Cara Check Tipe Motherboard PC

Cara Melihat Tipe Mobo PC bisa dilakukan tanpa harus membongkar PC yang bersangkutan, cara ini bisa dilakukan melalui DXDIAG atau Command Prompt (CMD).


  • Via DXDIAG
  1. Tekan Windows + R (Run) pada Keyboard
  2. Lalu Ketik "dxdiag" (Tanpa Tanda Petik) terus ENTER
  • Via Command Prompt (CMD)
  1. Tekan Windows + R (Run) pada Keyboard
  2. Lalu Ketik "cmd" (Tanpa Tanda Petik) terus ENTER
  3. Lalu Ketik "wmic" (Tanpa Tanda Petik) terus ENTER
  4. Lalu Ketik "baseboard" (Tanda Tanda Petik) terus ENTER
  • Via Command Prompt (CMD) versi 2
  1. Tekan Windows + R (Run) pada Keyboard
  2. Lalu Ketik "cmd" (Tanpa Tanda Petik) terus ENTER
  3. Lalu Ketik "wmic baseboard get product,Manufacturer,version,serialnumber" (Tanpa Tanda Petik) 
  4. Lalu ENTER

Semoga Bermanfaat ya....

Cara Check Type Mother Board PC Via CMD

Cara Mengecheck type Motherboard pada PC

Buka CMD dari WIN+R

lalu ketik

wmic baseboard get product,Manufacturer,version,serialnumber

Enter

How to Shut Down Windows 8 In Just One Click


Windows 8's Buried Power Button
Where Windows 7 displays its power button in a prominent place on its Start Menu, Windows 8 makes perform four actions just to turn y our computer off. To get to the power button in the new OS, you must pull out the Charms menu, click the Settings charm, click the Power button and then select Shutdown or Restart.
However, there’s an easy way to put the shutdown and restart functions just one click away from the desktop and Start screen. Just create shortcuts for both actions using the following steps:
  1. Navigate to the desktop.
  2. Right click on the desktop and select New -> Shortcut. A shortcut menu appears.
     Create new Shortcut
  3. Enter shutdown /s /t 0 (that’s a zero) in the location box and hit Next.
    Enter Shutdown /s /t 0 in the location box of the create a shortcut window.
  4. Enter a name for the shortcut and click Finish. A new shortcut will appear on your desktop.
    Name your shortcut and click Finish 
  5. Right click on the shortcut and select Properties. A dialog box appears.
  6. Click Change Icon under the Shortcut tab then Click Ok in warning box that says shutdown.exe contains no icons.
    Click Change Icon
  7. Select an Icon from the list of available images Click Ok twice (once to close the Change Icon window and once to close Properties window). Your shortcut will now have an icon.
     Choose the Icon for Your Shortcut
  8. Right click the shortcut and select Pin to Start. The shutdown icon will now appear on your Start screen.
     Pin to Start
  9. Drag the shutdown icon to a prominent place on your Start screen. We recommend putting it in the first column to the left so you will always see it.
    Drag your button to a prominent place
  10. Right click the icon and select Pin to Taskbar if you want the shortcut to live on your desktop’s taskbar as well.
    The Shutdown icon can be pinned to taskbar
  11. Repeat the previous steps to create a Restart button. Use the command “shutdown /r /t 0″ in the location field. 

Disable Uninstall Option For Windows 8 Modern UI Apps [Tip]


Windows 8 comes packed with a slew of new feature additions and enhanced user interface, but a lot of things have also been excluded from the latest release. With the release of Windows 8 looming on the horizon, we at AddictiveTips are trying to give you a preview of everything it will offer to the users. As most of us already know, the Start Orb has been replaced by the Start Screen, and instead of Desktop, the Start Screen is the main workspace that hosts all the installed applications. Whenever you install an application, instead of a shortcut on the desktop, a tile is created on the Start Screen that allows you to quickly launch it. In Windows 8, you can uninstall an app in multiple ways. The first method involves using Control Panel > Add & Remove Programs applet, but the second one lets you uninstall an app directly from the Start Screen. In this post, we will explain how you how can prevent your PC account holders from uninstalling Windows 8 UI based apps (formerly known as metro apps).

To uninstall an app from the Start Screen, all you need is to right click its title and select Uninstall from the options available at the bottom of the screen.
Start Screen
In order to restrict your PC users from uninstalling Windows 8 UI style apps, log in as Administrator or make sure that you have required administrative rights to change local group policies. First off, go to Start Screen, type gpedit.msc, select Apps from the right sidebar, and then click gpedit.msc in the main window.
Start-Screen5
The Local Group Policy Editor is the Microsoft Management Console snap-in that helps system administrator(s) in applying application and system components related restrictions. In Local Group Policy Editor, go to the following location.
User Configuration/ Administrative Templates/ Start Menu and Taskbar
In the main window, look for the Policy setting named Prevent users from uninstalling applications from Start and double click it to open the policy settings page.
Local Group Policy Editor
In the properties dialog box, there are options available to set the policy to Not Configured, Enabled and Disabled. Selecting each option allows you to view its impact in the Help section on the lower right side. Select Enabled option and close the Local Group Policy editor.
Prevent users from uninstalling applications from Start_2012-09-06_17-06-21
Now, open Windows Run console using Win+R hotkey combination, type in gpupdate /force and hit Enter to forcibly apply the new policy setting. Once the local group policy is updated, your PC users will not be able to uninstall the Windows 8 UI based apps from the Start Screen. It automatically hides the option to uninstall app from the Start Screen, as shown in the screenshot below.
Start Screen Uninstall

How To Disable Windows 8 Lock Screen


 In the past, we covered a guide on Windows 8 Lock Screen and discussed some of its features. The newly added Lock Screen is basically designed for tablet PCs, allowing users to quickly view the applications notifications, battery status, date and time, WiFi status/dynamic network icon etc. Although Windows 8 lets you tweak both Start and Lock Screen UI elements, it doesn’t provide an option to permanently disable it. You may know that Microsoft Management Console snap-in called Local Group Policy Editor allows system administrator(s) to tweak system core components and change default behavior of native utilities. Using the LGPE, you can easily disable the Lock Screen for all PC users. By default, Windows 8 shows Lock Screen at startup, but when it’s disabled, it takes you directly to Logon screen to choose the user account to log in to Windows.

Changing system settings from Local Group Policy Editor requires administrative privileges. So, log in to Windows as administrator, and on Start Screen, type gpedit.msc. Hit Enter to open Local Group Policy Editor.
gpedit.msc
Now, expand Administrative Templates settings from Computer Configuration, and then navigate toControl Panel –> Personalization. In main window, you will find Do not display the lock screen policy.
lock screen 1
Simply, double-click this policy and tick Enabled checkbox. This will permanently disable Lock Screen. When disabled, users will see the Logon screen when they log off or lock Windows. Similarly, you will be taken to Logon screen, instead of Lock Screen, at startup.
lock screen 2
It’s worth mentioning here that if it fails to disable the Lock Screen, then you may need to reboot your PC to implement the Lock Screen policy. In order to enable the Lock Screen for all users, all you need is to open the Local Group Policy Editor from an admin account, navigate to aforementioned setting, and enable Not Configured option.

Cara Mempercepat Komputer Lemot


1. Komputer lambat karena kekurangan Memory
Masalah komputer lambat karena minimnya RAM yang terpasang merupakan hal yang umumnya sudah diketahui oleh semua pengguna komputer.

Untuk itu cobalah cek kapasitas memory yang terpasang, untuk komputer sekelas Intel Pentium 4 dengan OS Windows XP dan aplikasi standar sebaiknya upgrade-lah memory menjadi minimal 1 GB.

2. Komputer lambat karena terlalu banyaknya program yang terinstall.
Secara pribadi saya sering menemukan komputer terutama milik pribadi yang di-install bermacam-macam program didalamnya, padahal aplikasi tersebut jarang atau bahkan tidak pernah digunakan sama sekali.

Periksalah program apa saja yang terinstall dikomputer dengan cara klik Add/Remove Program di Control Panel dan un-install program-program yang hanya menjadi "accesories" tersebut.

3. Komputer lambat karena terlalu banyak startup programs dan service yang berjalan.
Hal ini berkaitan dengan point no 2, semakin banyak program yang terinstall, semakin banyak pula program dan service yang akan dijalankan ketika windows startup.

Untuk menonaktifkan startup program dan service yang berjalan otomatis tersebut, masuklah ke "System Configuration Utility" dengan cara ketik: msconfig pada menu run, kemudian pada tab service dan startup lakukan uncheck terhadap aplikasi-aplikasi yang tidak diperlukan.

Untuk melihat aplikasi apa saja yang sedang berjalan, kita bisa menggunakan tool Prosesexplorer. Dengan tool ini kita dapat melihat dan menonaktifkan (kill) aplikasi apa saja yang tidak diperlukan atau dicurigai sebagai virus.

ProcessExplorer


4. Komputer lambat karena Temporary File yang sudah membengkak
Penyebab komputer lambat yang ke empat adalah sudah membengkaknya file-file temporary (sementara). Untuk Windows Xp lokasi file tersebut ada di:"C:\Documents and Settings\nama_user\Local Settings\Temp" dan"C:\WINDOWS\Temp". 

Untuk membersihkannya, delete-lah file-file yang terdapat di kedua lokasi tersebut atau jalankan program Disk CleanUp dengan cara klik start-run, ketik: "cleanmgr" lalu pilih drive yang akan di-cleanup.

5. Komputer lambat karena terlalu banyak program yang berfungsi sebagai "security program"
Security program seperti program antivirus dan firewall merupakan aplikasi tambahan yang harus ada pada komputer, tetapi janganlah terlalu berlebihan misalnya dengan menginstall 2-3 program antivirus sekaligus.

Untuk masalah security windows, yang terpenting adalah lakukan update, aktifkan firewall dan gunakan antivirus yang tidak membebani komputer seperti misalnya PCMAV Antivirus serta berhati-hatilah ketika menggunakan USB Flashdisk / Memory Card.

6. Komputer lambat karena masalah pada hardisk

Hardisk merupakan komponen kedua setelah RAM yang bisa menyebabkan komputer menjadi lambat. Masalah Komputer lambat yang disebabkan oleh hardisk ini diantaranya karena:
- hardisk low space
- hardisk yang terfragmentasi
- hardisk yang sudah lama, sehingga rpm-nya menurun
- hardisk error / bad sector

Cara mengatasi komputer lambat karena masalah pada hardisk diatas adalah:
- upgrade kapasitas hardisk dengan menambah atau ganti hardisk
- lakukan defragmenter pada hardisk secara berkala
- hindarkan hardisk dari debu, goncangan dan panas berlebih.
- perbaiki kerusakan pada hardisk dengan tool checkdisk.

7. Komputer lambat karena adanya virus, malware atau spyware pada komputer.
Apabila komputer kita sudah terlebih dahulu terserang virus atau malware, maka sebaiknya jalankan Windows Safe Mode, matikan fasilitas system restore dan gunakanlah program Virus Cleaner seperti misalnya Norman Malware Cleaner untuk membersihkan virus atau malware tersebut dan lakukan pula update pada sistem operasi.

8. Komputer lambat karena System Files ada yang corrupt atau bahkan hilang.
Biasanya terjadi setelah komputer terinfeksi virus dan file-file yang terinfeksi tersebut terlanjur rusak atau terdelete oleh antivirus. Solusi yang paling gampang adalah dengan merepair sistem operasi yang digunakan.

9. Komputer lambat karena masalah hardware overheat.
Hardware overheat baik itu terjadi pada hardisk, vga card, processor atau cpu secara umum bisa menyebabkan menurunnya kinerja komputer yang pada akhirnya komputer menjadi hang, lambat atau bahkan  sering restart. Untuk itu pastikan sirkulasi udara pada bagian dalam CPU berjalan dengan baik begitu juga pada fan (kipas angin) harus bersih dari debu dan dapat berputar dengan lancar.

10. Komputer lambat karena adanya masalah konektifitas pada jaringan / network 
Hal ini bisa terjadi karena trafic jaringan yang tinggi, hub atau switch yang hang atau adanya virus yang mencoba masuk ke sistem komputer kita. Untuk mengatasinya, coba lepas dan pasangkan kembali konektor RJ45 pada LAN Card atau Roset LAN, restart Switch / hub dan gunakan program Port scanner untuk melihat packet data apa saja yang masuk dan keluar dari komputer kita.

Mungkin itulah beberapa hal penyebab dan cara mengatasi komputer lambat yang bisa saya simpulkan berdasarkan pengalaman yang sering saya temui, tambahan dan koreksi lainnya saya tunggu...thank,

Cara Menganalisa Blue Screen

Setelah saya bertanya-tanya sama Mbah Google akhirnya saya menemukan 2 buah tools yang saya rasa berguna untuk menganalisa penyebab terjadinya BlueScreen, yaitu dengan apilikasi BlueScreenView dan Whoscrashed.

1. Menganalisa Penyebab BlueScreen dengan BlueScreenView

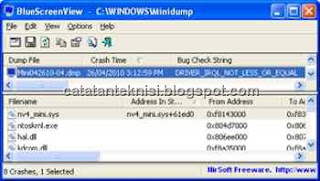
BlueScreenView mempunyai beberapa keunggulan, selain gratis, portable, ukuran file yang kecil dan saya rasa cukup mudah untuk digunakan. Cara kerja file ini adalah dengan mengambil informasi dari file minidump yang dibuat secara otomatis oleh system saat terjadinya system crash atau BlueScreen. File Minidump ini secara default akan disimpan pada folder C:\Windows\Minidump. Informasi  penyebab BlueScreen dari file minidump tersebut akan ditampilkan dalam bentuk tabel, seperti misalnya waktu  dan penyebab terjadinya system crash.

Berikut adalah cara untuk menganalisa penyebab terjadinya BlueScreen dengan bantuan BlueScreenView.
  • Jalankan Program BlueScreenView. BlueScreenView akan secara otomatis menscan file-file minidump pada folder C:\Windows\Minidump. Setelah selesai akan menampilkan jendela seperti pada gambar dibawah :

    BlueScreen View
  • Klik pada salah satu Dump File tersebut untuk menampilkan informasi detail dalam jendela popup.


    Tampilan Bluescreen
BlueScreenView dapat berjalan di Windows XP, Windows Server 2003,Windows Server 2008, Windows Vista dan Windows 7.

2. Menganalisa Penyebab BlueScreen dengan WhoCrashed Home Edition

Sama seperti halnya BlueScreenView, WhoCrashed Home Edition bersifat free dan cukup mudah dalam pengoperasiannya. Untuk menganalisa penyebab BlueScreen, klik tombol Analyse. Hasil analisanya akan muncul pada bagian bawah, lengkap dengan tanggal dan waktu kejadian, penyebab system crash, dan keterangan lainnya.

who crashed bluesacreen

Untuk menjalankan program ini kita harus meng-installnya terlebih dulu pada komputer setelah sebelumnya kita juga harus menginstall  aplikasi Debugging Tools for Windows.

Lantas, apa yang harus dilakukan jika penyebab BlueScreen sudah ditemukan?  

Ya tergantung masalahnya... Kalau dilihat dari contoh diatas, maka peyebab BlueScreen adalah driver nv4_mini.sys (VGA Card) dan vsapint.sys (Trend Micro Antivirus) yang tidak cocok / tidak sempurna. Maka untuk troubleshootingnya ya seputar VGA Card dan Antivirus, misalnya dengan me-remove atau mengupdate driver yang dibutuhkan...

Cara Me-Mengabadikan Tampilan BlueScreen

Banyak hal yang bisa menyebabkan komputer mengalami fatal error dan menampilkan pesan “BlueScreen”. Langkah awal untuk mendiagnosa penyebab yang mengakibatkan tampilan BlueScreen adalah dengan membaca pesan error yang ditampilkan pada layar tersebut. 

Masalahnya adalah kadang-kadang komputer langsung restart sesaat setelah menampilkan error blue screen, untuk itu kita terlebih dahulu harus menonaktifkan settingan “Automatic Restart on System Failure “ pada System Properties Windows, yaitu dengan cara sebagai berikut:
  • Klik kanan My Computer, klik Properties atau bisa juga dengan buka Control Panel, pilih Performance and Maintenance lalu klik System.
  • Pada jendela System Properties klik tab Advanced.
  • Pada bagian Startup dan Recovery klik tombol Settings
  • Pada bagian System Failure, hilangkan tanda check (uncheck) pilihan Automatically restart
  • Langkah selanjutnya adalah memastikan bahwa pada saat komputer crash, secara otomatis system akan membuat file Dump untuk keperluan analisa. Untuk itu pastikan pada bagian Write debugging information kita tidak memilih opsi "none".
  • Klik OK dan tutup System Properties.

Sekarang apabila Tampilan Blue Screen muncul, kita bisa dengan leluasa membaca dan menganalisa informasi yang disampaikan. Kita juga bisa memanfaatkan beberapa tools untuk menganalisa Tampilan Bluescreen lewat file dump yang telah dibuat. Semoga bermanfaat..

Cara Memperbaiki Hardisk Bad Sector

Bad sektor atau bad block adalah istilah yang digunakan untuk menyebut area yang rusak pada hardisk. Bad Sector pada hardisk ini secara umum terdapat 2 macam, yaitu bad sektor secara fisik dan bad sektor secara software. Bad sector secara fisik terjadi karena adanya keruksakan pada bagian plate hardisk yang bisa terjadi karena hardisk terkena debu, hardisk terjatuh, terkena benturan keras dan sebagainya. Sedangkan bad sector secara software bisa terjadi ketika hardisk sedang sibuk tiba-tiba komputer mati, misalnya karena mati listrik.

Terdapat beberapa tools aplikasi yang dapat kita gunakan untuk memperbaiki kondisi hardisk yang mengalami bad sektor secar software yaitu:

1. Menggunakan HDD Low Level Format Tool
Progam Low level format adalah utility yang berfungsi untuk menghapus seluruh informasi baik partisi, data didalam hardisk serta informasi bad sektor. Setelah menjalankan low level format maka kondisi hardisk akan benar-benar bersih seperti kondisi pertama kali digunakan. Jadi sebelumnya  pastikan data yang diperlukan di-backup terlebih dahulu. Melihat fungsinya itu, maka selain digunakan untuk memperbaiki bad sektor, tool low level format bisa kita gunakan untuk membersihkan data-data yang sangat pribadi atau rahasia secara permanen.
Menggunakan HDD Low Level Format Tool

Berikut adalah langkah-langkah untuk menggunakan HDD Low Level Format Tool:
  1. Download program HDD Low Level Format di hddguru.com.
  2. Install dan jalankan program HDD Low Level Format tools sehingga muncul tampilan seperti dibawah :
  3. Pilih hardisk yang akan di-format, kemudian klik Continue..
  4. Klik tab LOW-LEVEL FORMAT, klik FORMAT THIS DEVICE
  5. Tunggu sampai selesai, dan biasanya prosesnya akan memakan waktu cukup lama jadi luangkanlah waktu yang cukup.
Selain untuk hardisk (SATA, IDE atau SCSI), HDD Low Level Format Tool bisa juga untuk memformat Flashdisk, Flash card dan sejenisnya.

2. Menggunakan Bad Block Recovery Softwares dari vendor hardisk

Beberapa vendor hardisk mengeluarkan software / tool diagnostic untuk melakukan analisa dan maintenance hardisk, diantaranya adalah :
    
1. Fujitsu IDE Low level Format Utility

Fujitsu IDE Low level Format Utility
Software untuk memperbaiki hardisk bad sektor dari Fujitsu, dapat di download di: www.fujitsu-europe.com/support/disk/software/erase.zip

2. Seagate's Seatools for Windows dan Seagate's Seatools for DOS

Seagate's Seatools for Windows

Diagnostic Tools dari Seagate yang dapat digunakan untuk hardisk merek Seagate, Maxtor ataupun hardisk dari vendor lain, dapat di download di: www.seagate.com.

3. Western Digital Data Lifeguard Diagnostics

Merupakan tools untuk maintenance dan repair hardisk, khusus untuk Hardisk dari Western Digital dapat Anda download di: www.softpedia.com

Semoga membantu..

Cara Tweaking Registry

Bagi anda yang memiliki komputer dengan spesifikasi biasa saja, tapi ingin kinerja OS Windows anda seperti memiliki spesifikasi luar biasa. Tips berikut dapat anda coba untuk mendongkrak kinerja Windows anda.

Tweaking registry pada Windows XP sangat mempengaruhi performance Windows anda. Karena registry mengatur semua kebutuhan Windows anda. Berikut beberapa trik tweaking registry untuk mempercepat performance Windows anda.

- Mendisable Ballon Tips

  • Klik Start >> Run. Ketik “regedit” lalu tekan “Enter“.
  • Masuk ke HKEY_CURRENT_USER\Software\Microsoft\ Windows\CurrentVersion\Explorer\Advanced.
  • Tambahkan DWORD Value, caranya : Klik kanan, pilih New >> DWORD Value. Lalu beri nama sebagai berikut :
  • “EnableBalloonTips“, double klik lalu isi dengan nilai 0
  • “ShowInfoTip“, double klik lalu isi dengan nilai 0

- Mendisable Security Center Warning

  • Masuk ke HKEY_LOCAL_MACHINE\SOFTWARE\Microsoft\Security Center.
  • Tambahkan DWORD Value dengan nama “FirewallDisableNotify” dan “AntiVirusDisableNotify“. Isi dengan nilai 1.

- Mendisable Low Disk Warning

  • Masuk ke HKEY_CURRENT_USER\Software\MicroSoft\ Windows\CurrentVersion\Policies\Explorer.
  • Tambahkan DWORD Value dengan nama “NoLowDiskSpaceChecks“. Isi dengan nilai 1.

- Mendisable Wrapping Icon/Shortcut Labels

  • Masuk ke HKEY_CURRENT_USER\Control Panel\Desktop\WindowMetrics.
  • Tambahkan DWORD Value dengan nama “IconTitleWrap“. Isi dengan nilai 0.

- Defrag System Files Otomatis

  • Masuk ke HKEY_LOCAL_MACHINE\Software\Microsoft\Dfrg\BootOptimizeFunction.
  • Ubah nilai “Enable” ke “Y“.

- Mempercepat Shutdown

  • Masuk ke HKEY_CURRENT_USER\Control Panel\Desktop.
  • Ubah nilai berikut :
  • AutoEndTasks (ubah ke nilai 1)
    HungAppTimeout
    (ubah ke nilai 4000)
    WaitToKillAppTimeout (ubah ke nilai 4000)
  • Masuk ke HKLM\SYSTEM\CurrentControlSet\Control.
  • Ubah nilai “WaitToKillServiceTimeout” ke nilai 4000.

- Fix Shutdown Computer Automatically

  • Masuk ke HKEY_LOCAL_MACHINE\Software\Microsoft\Windows NT\CurrentVersion\Winlogon.
  • Ubah nilai “PowerdownAfterShutdown” ke nilai 1.

- Fix Mempercepat Shutdown Lambat

  • Masuk keHKEY_CURRENT_USER\Control Panel\Desktop.
  • Ubah nilai “PowerOffActive” ke nilai 1.

- Mempercepat NTFS File System

  • Masuk ke HKEY_LOCAL_MACHINE\System\CurrentControlSet\Control\Filesystem.
  • Ubah nilai parameter berikut :
  • DisableNTFSLastAccessUpdate (Ubah ke nilai 1)
    NtfsDisable8dot3NameCreation (Ubah ke nilai 1)

- Membuat Desktop Lebih Stabil

  • Masuk keHKEY_CURRENT_USER/Software/Microsoft/Windows/CurrentVersion/Explorer.
  • Tambahkan DWORD Value dan beri nama “DesktopProcess“.
  • Isi nilai 1.

- Mengoptimalkan Harddisk Disaat Komputer Dalam Keadaan Idle

  • Masuk keHKEY_LOCAL_MACHINE\SOFTWARE\Microsoft\Windows\Curr entVersion\OptimalLayout.
  • Tambahkan DWORD Value dan beri nama “EnableAutoLayout“.
  • Isi nilai 1.

- Mempercepat Loading Windows Menu

  • Masuk ke HKEY_CURRENT_USER\Control Panel\Desktop\.
  • Ubah nilai parameter “MenuShowDelay” ke angka 1

Cara Tweaking Windows XP

Teknik tweaking Windows XP memang sudah banyak sekali beredar di internet, teknik tweaking kali ini hanyalah sebuah teknik yang sudah biasa dijumpai di banyak web ataupun blog. Semoga teknik tweaking yang sederhana ini bermanfaat bagi saudara yang membutuhkanya.

Untuk mempercepat Windows XP, hal pertama yang harus dilakukan adalah pembersihan file-file sampah/yang tidak diperlukan.


– Melakukan Pembersihan Standar –

Setelah Anda selesai menginstall Windows XP dan aplikasi-aplikasi yang Anda butuhkan, saatnya Anda melakukan pembersihan standar terhadap file-file sampah pada sistem operasi Windows XP Anda. Yaitu dengan cara:

  • Klik kanan icon MY COMPUTER di desktop Anda, atau klik kanan pada menu MY COMPUTER yang ada di Start Menu, lalu pilih PROPERTIES.
  • Selanjutnya akan muncul jendela MY COMPUTER berisi daftar drive yang terpasang di komputer Anda. Klik kanan pada drive “C“.
  • Klik tombol Disk Cleanup yang terletak di kanan bawah lingkaran diagram kapasitas ruang hard drive Anda.
  • Selanjutnya akan muncul daftar jenis file sampah yang ingin Anda hapus. Beri tanda centang untuk semua entri (atau yang Anda inginkan), lalu klik OK. Sistem akan mengkonfirmasi proses pembersihan, jawab “Yes” untuk menyetujui.
  • Jika proses pembersihan selesai, Anda akan kembali ke jendela “Properties” hard drive. Beri tanda centang pada entri “Compress drive to save disk space” (untuk mengkompresi file-file di hard drive sehingga memberi ruang penyimpanan lebih besar), lalu klik OK. Saat muncul konfirmasi untuk mengkompresi hard drive, klik OK untuk setuju.

– Singkirkan File Uninstall Windows Update –

Jika Anda melakukan update terhadap sistem operasi Windows, baik itu berupa patch, hotfix, atau komponen lain yang dibutuhkan Windows, maka komputer akan melakukan backup terhadap file sistem Anda. Jadi, Anda dapat menguninstall update tersebut jika diperlukan.

Namun, penulis berasumsi bahwa Anda membutuhkan update terbaru dan tidak akan mengembalikan file sistem yang tidak “up-to-date”. Jadi, alangkah baiknya jika Anda menghapus backup file sistem uninstall Anda, sehingga dapat menghemat sedikitnya 100 MB ruang kosong pada hard drive Anda.

Untuk itu, lakukan langkah berikut:

  • Pada jendela Windows Explorer, klik menu TOOLS, lalu pilih FOLDER OPTIONS. Selanjutnya, klik tab VIEW, dan aktifkan opsi berikut sesuai instruksi penulis, lalu klik OK.

- Show hidden files and folders (On)
- Hide protected operating system files (Off)

  • Masuk ke folder Windows (umumnya C:\WINDOWS), dan hapus folder dengan awalan $, misalnya “$NtUninstallKB______$“. Tapi jangan hapus folder “$hf_mig$“, mengingat folder tersebut berisi informasi yang berhubungan dengan proses update sistem Anda.

– Hapus File Precompiled Setup Files –

Precompiled Setup Files adalah kumpulan file cache dari aplikasi-aplikasi yang terpasang di sistem operasi Windows XP. File-file ini akan membuat aplikasi yang pernah Anda buka dapat berjalan lebih cepat. Biarpun demikian, beda kecepatannya tidak signifikan, dan akan menghemat sekitar 30 MB jika dihapus. Nah, jika Anda ingin menghapusnya, silahkan ikuti langkah berikut.

  • Klik START, lalu pilih RUN.
  • Pada kotak dialog RUN, ketik CMD lalu klik OK atau tekan ENTER.
  • Anda akan masuk ke modus Command Prompt. Ketik del c:\windows\inf\*.pnf, lalu tekan ENTER. Jika ada konfirmasi, tekan Y untuk setuju.
  • Jika sudah selesai, ketik EXIT dan tekan ENTER untuk keluar dari modus Command Prompt.

Singkirkan file-file Software Distribution

Software Distribution adalah kumpulan file-file sampah hasil instalasi Windows Update, besarnya dapat mencapai 300 MB! Tak ada ruginya jika Anda menghapusnya, karena file-file ini bahkan tidak disentuh Windows jika Anda ingin meng-uninstall update yang pernah Anda lakukan.

  • Klik START, lalu pilih RUN.
  • Pada kotak dialog RUN, ketik C:\WINDOWS\SOFTWARE DISTRIBUTION\DOWNLOAD, lalu klik OK atau tekan ENTER.
  • Saatnya mengganyang habis seluruh file di jendela folder yang Anda lihat!. Alangkah baiknya jika anda menghapus file dengan menggunakan Shift + Delete, karena file-file tersebut akan langsung dihapus secara permanen tanpa “mampir” di Recycle Bin.

– Buang DLL CACHE –

Jika Windows mengalami masalah, misalnya file sistem terhapus, terkena virus, atau terkontaminasi, secara otomatis Windows akan me-restore file-file penting tersebut dengan mengambil file cadangan di folder DLLCACHE yang tersembunyi. Jika folder DLLCACHE dihapus, maka Windows akan meminta Anda memasukkan CD instalasi Windows XP jika ada masalah dengan file sistem Anda.

Ingat! Penulis menawarkan Anda untuk menghapus folder ini karena ukurannya yang sangat besar, kira-kira 400 MB!

Jika Anda pengguna komputer yang tak pernah mengutak-atik sistem, rasanya aman-aman saja untuk menghapusnya.

Namun, jika Anda seorang yang gemar bongkar pasang aplikasi, sebaiknya menjadikan pilihan ini sebagai opsi terakhir.

  • Klik START, lalu pilih RUN.
  • Pada kotak dialog RUN, ketik C:\WINDOWS\SYSTEM32\DLLCACHE, lalu klik OK atau tekan ENTER.
  • Anda ingin menjadi eksekutor file sistem Windows? Jangan beri ampun semua file yang Anda lihat, hapus semua…

Cara Menyembunyikan Partisi pada Komputer

Jika anda pengguna komputer yang tidak menginginkan data anda atau lainya yang berada pada partisi hardisk dibuka atau diketahui oleh orang lain, maka anda dapat menyembunyikanya agar tidak bisa dilihat oleh pengguna komputer itu sendiri. Berikut tips yang dapat anda coba.

Misalnya anda ingin menyembunyikan partisi F, berikut screenshoot-nya : disk

  1. Buka Command Prompt, klik Start Menu >> All Programs >> Accesories >> Command Prompt. Jika anda pengguna Windows 7, klik Start Menu, kemudian ketikkan Command, lalu tekan Enter.
  2. Jika jendela telah terbuka, ketikkan diskpart pada Command Prompt. Jika Command Prompt tidak bisa terbuka, kemungkinan Command Prompt anda ter-disable oleh virus atau program lainya. Baca disini untuk mengatasi masalah-masalah tersebut.
  3. Selanjutnya, ketikkan list volume untuk mengetahui volume/isi semua partisi pada hardisk.
  4. Dalam contoh ini kita akan menyembunyikan partisi F, maka ketikkan select volume 4 untuk memilih partisi F. Kemudian ketikkan remove letter F untuk menyembunyikan partisi F dari My Computer.
    diskpart
  5. Selesai. Hasilnya : Partisi F hilang dari pandangan.
    diskpart_
  6. Untuk menampakkan kembali partisi-partisi yang tersembunyi, ulangi langkah-langkah diatas. Pada perintah remove letter F diganti dengan assign letter F.
  7. Semoga bermanfaat.

Cara Mempercepat Instalasi Windows XP

Trik berikut digunakan untuk mempercepat proses GUI instalasi Windows XP.

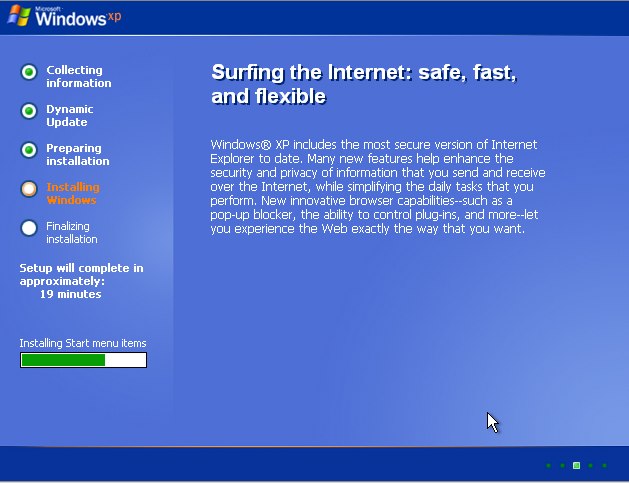
  1. Pada saat terlihat tampilan proses instalasi Windows, tekan tombol Shift + f10 pada keyboard.
  2. proses-instalasi-windows

  3. Akan muncul jendela Command Prompt, ketikkan “taskmgr” (tanpa kutip).
  4. task-manager

  5. Akan muncul jendela Task Manager, lalu buka tab “Processes“.
  6. Klik kanan pada setup instalasi yang sedang berjalan “setup.exe“, sorot “Set Priority” pilih “High” atau “Above Normal“.
  7. mempercepat-instalasi-windows-xp

  8. Cara ini akan mengurangi waktu hampir 50% dalam proses instalasi.

Cara Merubah Boot Screen Windows XP tanpa merubah file NTOSKRNL.EXE

Membuat bootscreen adalah pekerjaan yang sangat rumit sekali (Klo pke Tune up Utility sih GAMPANG bgt), karena jika ada kesalahan maka Komputer anda tidak akan bisa masuk Windows.

Sedikit penjelasan tentang bootscreen. Ada 4 jenis file Bootscreen dalam windows XP
1. ntoskrnl.exe ( Windows Type Single Processor Kernel )
2. ntkrnlmp.exe ( Windows Type Multi Processor Kernel)
3. ntkrnlpa.exe ( Windows Type Single Processor Kernel dan RAM lebih dari 3GB )
4. ntkrpamp.exe ( Windows Type Multi Processor Kernel dan RAM lebih dari 3GB )

Oke langsung saja bagaimana cara mengubah Bootscreen, ikuti langkah-langkahnya dibawah ini:

1. Buat file Boot Screen (Reshack file NTOSKRNL.EXE di C:\WINDOWS\system32 jgn lupa di save as)
2. Setelah itu simpan file boot screen Tersebut di C:\WINDOWS\SYSTEM32 dengan nama "filebootscreen.exe"
3. Edit File Boot.ini yang ada di Drive C ( Root Directory System Operasi Windows anda).
4. Setelah anda menemukan file tersebut, silahkan anda buka, dan kira-kira isinya seperti dibawah ini:


[boot loader]
timeout=0 default=multi(0)disk(0)rdisk(0)partition(1)\WINDOWS [operating systems] multi(0)disk(0)rdisk(0)partition(1)\WINDOWS=”Microsoft Windows XP Professional” /noexecute=optin /fastdetect


5. Lalu tambahkan string seperti dibawah ini, sebelumnya backup dulu file boot.ini, untuk menghindari jika terdapat suatu kesalahan


multi(0)disk(0)rdisk(0)partition(1)\WINDOWS=” My new boot screen ” /fastdetect\kernel=filebootscreen.exe


6. Restart Komputer anda, dan lihat hasilnya

Cara Merubah Boot Screen Pada CD Setup Windows XP

Maaf Pemirsa Bukan nya sombong pke bahasa Inggris
(emg dr sono'a Inggris)

---------------------------
I have seen a lot of sites that talk about XP boot screen,but most
of them are not complete,and also some of them will not work in all
kinds of windows xp.
So here i am going to tell you almost all you need.

==============================================
Notes befor talking about changing boot screen:
-----------------------------------------------
Windows XP always uses NTOSKRNL.EXE (inside ..system 32 directory) to show
boot screen.But this file is defferent for each kind of systems.
so if you make a boot screen that works perfectly in your system,there is
posibility that not work in your friend's computer.

so what we should know and what we must do:
-------------------------------------------
There is 4 kinds of boot screen file in windows XP CD as below:

ntoskrnl.exe
ntkrnlmp.exe
ntkrnlpa.exe
ntkrpamp.exe

These 4 kernel files are located in "SP2.cab" inside I386 directory of XP setup CD.
At the time that XP setup begins to copy needed files to hard, it detects the kind
of Processor used in system.

If it is Windows Single Processor Kernel type,then setup process copies ntoskrnl.exe
from sp2.cab to system32 directory of computer.

If it is Windows Multi Processor Kernel type,then setup process copies ntkrnlmp.exe
from sp2.cab to system32 directory of computer,and also renames that to ntoskrnl.exe.

ntkrnlpa.exe is for Windows Single Processor Kernel with more then 3 GB of RAM

ntkrpamp.exe is for Windows Multi Processor Kernel with more then 3 GB of RAM

Note that:
AMD Processors are ALL considered Single Processor systems.
Intel Pentium 4 processors WITH Hyperthreading are Multi Processors .
All NON Hyperthreaded processors are Single.


(If you do not know your system is single or multi processor kernel,and look at
processors,if there is written the type of your processor in one raw,so you are
using single kernel,but if there is written in two raw so you are using multi).

==============================================
Changing boot screen
--------------------
So if we want to change our boot screen,so that can work on all systems,we must
change all of those 4 kernel files.and we do as steps below:

Step_1.Copy sp2.cab from I386 directory of your XP setup CD to some where.
Step_2.extract sp2.cab by winrar (or any cab extractor) to a folder for example
foder xxx.
Step_3.Change boot screens files that you have made before (I will tell you how to make
them in step_5),with those are inside xxx.
Step_4.Use iexpress (by going start,then run and typing iexpress,and pressing enter),and
make new sp2.cab ,then replace this sp2.cab by the one inside I386 directory of XP
setup CD.If you do not know how to use this program,searck in web or Email me to
get help.
Step_5.Making boot screen files:
---------------------------
A).There are several ways to make your own boot screen,but most of the times your
boot screen will differ less or more by the BMP file that you have made.I have
tested several programs to make boot screen by my BMP picture,and i have found
Tuneup utilities and BootLogo to work more perfect most of the times.So i
recommand you to use one of them,but any it is up to you which way to select.
Any way that you want to use is not very important,just pay attention to
paragraph below.

:lol:.When you have a system that uses single kernel,all of the programs will make
ntoskrnl.exe
and if you have a system that uses Multi Processors kernel,all of the programs
will make ntkrnlmp.exe,but will rename that to ntoskrnl.exe.
So we do as below:
for example our system is multi proccessor, Know we make a boot screen by a
program and then we change the name of file made by that program to ntkrnlmp.exe
( because in this example i sayed that we are using multi kernel),and keep it
some where.
if you want to do every thing your self,you should copy your ntoskrnl.exe from
system32 directory,change its BMP picture by resource haker or any other program
and then rename it to ntkrnlmp.exe and keep it some where.
Know we should make single type boot screen,it is better we use other computer that
is single kernel,and do as i told you above,and this time keep it by the name of
ntoskrnl.exe some where.if you do not find other computer you can use virtualPC or
vMWare because even you have multi kernel,these virtual programs will make as single.

Step_6.When you have made your files (Most of the times changing two files ntoskrnl.exe and
ntkrnlmp.exe are enough for most computers),you should use file Modifype.exe and modify
your files by that (Modifype.exe is acommand type file,is about 9KB,you can download it
from MSFN links and must put it inside your windows system32 directory)
any way after placing Modifype.exe in your system32 directory go to command prompt and
type:
modifyPE.exe ntoskrnl.exe -c and hit enter and again type
modifyPE.exe ntkrnlmp.exe -c and hit enter
Now your files are modified and you use them as i toled in steps 3 and 4

Code Beep pada BIOS

Kode Beep AWARD BIOS
-------------------------------------------------------------------
1 beep pendek PC dalam keadaan baik
1 beep panjang Problem di memori
1 beep panjang 2 beep pendek Kerusakan di modul DRAM parity
1 beep panjang 3 beep pendek Kerusakan di bagian VGA.
Beep terus menerus Kerusakan di modul memori atau memori video


Kode Beep AMI BIOS
-------------------------------------------------------------------
1 beep pendek DRAM gagal merefresh
2 beep pendek Sirkuit gagal mengecek keseimbangan DRAM Parity (sistem memori)
3 beep pendek BIOS gagal mengakses memori 64KB pertama.
4 beep pendek Timer pada sistem gagal bekerja
5 beep pendek Motherboard tidak dapat menjalankan prosessor
6 beep pendek Controller pada keyboard tidak dapat berjalan dengan baik
7 beep pendek Video Mode error
8 beep pendek Tes memori VGA gagal
9 beep pendek Checksum error ROM BIOS bermasalah
10 beep pendek CMOS shutdown read/write mengalami errror
11 beep pendek Chache memori error
1 beep panjang 3 beep pendek Conventional/Extended memori rusak
1 beep panjang 8 beep pendek Tes tampilan gambar gagal


Kode Beep IBM BIOS
-------------------------------------------------------------------
Tidak ada beep Power supply rusak, card monitor/RAM tidak terpasang
1 beep pendek Normal POST dan PC dalam keadaan baik
beep terus menerus Power supply rusak, card monitor/RAM tidak terpasang
Beep pendek berulang-ulang Power supply rusak, card monitor/RAM tidak terpasang
1 beep panjang 1 beep pendek Masalah Motherboard
1 beep panjang 2 beep pendek Masalah bagian VGA Card (mono)
1 beep panjang 3 beep pendek Masalah bagian VGA Ccard (EGA).
3 beep panjang Keyboard error
1 beep, blank monitor VGA card sirkuit

Cara Membuat Transfer Data antar Komputer Lebih Cepat

Klik start-setting-network connection-pilih lan card
properties-configure-advanced-pada kolom property pilih speed & duplex
sebelah kanannya ada pilihan value
standarnya auto negotiation-lo pilih aja yang 100mbps full duplex...

Cara Me-Repair Registry

Windows Registry Editor Version 5.00

[HKEY_CURRENT_USER\Control Panel\Desktop]
"ActiveWndTrkTimeout"=dword:00000000
"AutoEndTasks"="0"
"CaretWidth"=dword:00000001
"CoolSwitch"="1"
"CoolSwitchColumns"="7"
"CoolSwitchRows"="3"
"CursorBlinkRate"="530"
"DragFullWindows"="1"
"DragHeight"="4"
"DragWidth"="4"
"FontSmoothing"="2"
"FontSmoothingOrientation"=dword:00000001
"FontSmoothingType"=dword:00000001
"ForegroundFlashCount"=dword:00000003
"ForegroundLockTimeout"=dword:00030d40
"GridGranularity"="0"
"HungAppTimeout"="5000"
"LowPowerActive"="0"
"LowPowerTimeOut"="0"
"MenuShowDelay"="0"
"PaintDesktopVersion"=dword:00000000
"Pattern"="(None)"
"PowerOffActive"="0"
"PowerOffTimeOut"="0"
"ScreenSaverIsSecure"="0"
"ScreenSaveTimeOut"="600"
"ScreenSaveActive"="1"
"SCRNSAVE.EXE"="C:\\WINDOWS\\System32\\logon.scr"
"TileWallpaper"="0"
"UserPreferencesMask"=hex:9e,3e,07,80
"WaitToKillAppTimeout"="20000"
"Wallpaper"="C:\\WINDOWS\\web\\wallpaper\\Bliss.bmp"
"WallpaperStyle"="2"
"OriginalWallpaper"=""
"WheelScrollLines"="3"

[HKEY_CURRENT_USER\Control Panel\Desktop\WindowMetrics]
"BorderWidth"="0"
"CaptionFont"=hex:f3,ff,ff,ff,00,00,00,00,00,00,00,00,00,00,00,00,bc,02,00,00,\
00,00,00,01,00,00,00,00,54,00,72,00,65,00,62,00,75,00,63,00,68,00,65,00,74,\
00,20,00,4d,00,53,00,00,00,00,00,00,00,00,00,00,00,00,00,00,00,00,00,00,00,\
00,00,00,00,00,00,00,00,00,00,00,00,00,00,00,00,00,00,00,00,00,00
"CaptionHeight"="-375"
"CaptionWidth"="-270"
"IconFont"=hex:f5,ff,ff,ff,00,00,00,00,00,00,00,00,00,00,00,00,90,01,00,00,00,\
00,00,01,00,00,00,00,54,00,61,00,68,00,6f,00,6d,00,61,00,00,00,00,00,00,00,\
00,00,00,00,00,00,00,00,00,00,00,00,00,00,00,00,00,00,00,00,00,00,00,00,00,\
00,00,00,00,00,00,00,00,00,00,00,00,00,00,00,00,00,00,00,00,00
"IconSpacing"="-1125"
"IconTitleWrap"="1"
"IconVerticalspacing"="-1125"
"MenuFont"=hex:f5,ff,ff,ff,00,00,00,00,00,00,00,00,00,00,00,00,90,01,00,00,00,\
00,00,01,00,00,00,00,54,00,61,00,68,00,6f,00,6d,00,61,00,00,00,00,00,00,00,\
00,00,00,00,00,00,00,00,00,00,00,00,00,00,00,00,00,00,00,00,00,00,00,00,00,\
00,00,00,00,00,00,00,00,00,00,00,00,00,00,00,00,00,00,00,00,00
"MenuHeight"="-285"
"MenuWidth"="-270"
"MessageFont"=hex:f5,ff,ff,ff,00,00,00,00,00,00,00,00,00,00,00,00,90,01,00,00,\
00,00,00,01,00,00,00,00,54,00,61,00,68,00,6f,00,6d,00,61,00,00,00,00,00,00,\
00,00,00,00,00,00,00,00,00,00,00,00,00,00,00,00,00,00,00,00,00,00,00,00,00,\
00,00,00,00,00,00,00,00,00,00,00,00,00,00,00,00,00,00,00,00,00,00
"ScrollHeight"="-255"
"ScrollWidth"="-255"
"Shell Icon BPP"="16"
"SmCaptionFont"=hex:f5,ff,ff,ff,00,00,00,00,00,00,00,00,00,00,00,00,bc,02,00,\
00,00,00,00,01,00,00,00,00,54,00,61,00,68,00,6f,00,6d,00,61,00,00,00,00,00,\
00,00,00,00,00,00,00,00,00,00,00,00,00,00,00,00,00,00,00,00,00,00,00,00,00,\
00,00,00,00,00,00,00,00,00,00,00,00,00,00,00,00,00,00,00,00,00,00,00
"SmCaptionHeight"="-255"
"SmCaptionWidth"="-255"
"StatusFont"=hex:f5,ff,ff,ff,00,00,00,00,00,00,00,00,00,00,00,00,90,01,00,00,\
00,00,00,01,00,00,00,00,54,00,61,00,68,00,6f,00,6d,00,61,00,00,00,00,00,00,\
00,00,00,00,00,00,00,00,00,00,00,00,00,00,00,00,00,00,00,00,00,00,00,00,00,\
00,00,00,00,00,00,00,00,00,00,00,00,00,00,00,00,00,00,00,00,00,00
"AppliedDPI"=dword:00000060
"Shell Icon Size"="32"
"MinAnimate"="1"

Cara Mempercepat Startup, Shutdown dan Operating System

[startup]
1. Masuk menu RUN >>> Ketikan MSCONFIG >> OK >> Pilih menu Start Up >> Hilangkan semua centang pada Start up kecuali Program Anti virus
2. Klik Menu service >> Hilangkan cawang pada Automatic Updates
3. Setelah itu >>> Aplly >>> Ok

[shutdown]
4. Masuk run >> ketik Regedit >> >> ok
5. My Computer >>> hkey_current_user >> control panel >> desktop >>
6. Cari menu show delay >> doble klik dan rubah value data menjadi 10
7. Cari hung-up time out >> doble klik rubah value dataya menjadi 5
8. My Computer >> hkey_local_machine >> system >> controlset001 >> control >> wait to kill service >> rubah valuenya menjadi 500
9. My Computer >> hkey_local_machine >> system >> control set002 >> control >> wait to kill service >> rubah valuenya menjadi 500
10. My Computer >> hkey_local_machine >> system >> current control set> control >> sesion manager >> memory management >> disable paging excecutive >> rubah value data menjadi 1

[Operating System]
11. Masuk Control Panel >> System >> Advanced >> Performance Setting >>> Pilih Custom >> Cawang pada : “Use Drop Shadow For Icon labels on the dekstop” dan “Use Visual styles on windows and buttons” dan kemudian aplly.
12. Pada menu advanced >>> Virtual memory >> Change >> Klik pada drive c:Windows >> Pilih Custom Size >> Rubah Value pada initial size dan maximum Size 2 kali lipat dari value sebelumnya misal 256 rubah ke 512 , 512 rubah 1000) atau anda bisa merubah sesuai keinginan anda asal lebih besar dari value sebelumnya, Kemudian klik Ok.

Cara Mempercepat "Please Wait" Windows XP

Perhatikan Langkah berikut ini:

1. Copy Paste di Notepad lalu Save dalam bentuk *.bat

@echo off
del C:\WINDOWS\Prefetch\*.* /q

2. Copy file *.bat ke C:
3. Start -> Run... Ketik gpedit.msc Terus Enter
4. Setelah muncul, Pilih :
Local Computer Policy -> Windows Settings -> Scripts(Startup/Shutdown)
5. DoubleKlik Shutdown-> Add -> Browse
Pilih Drive C, cari ngebut.bat Terus OK -> Apply -> OK
6. Restart untuk melihat efeknya. SELESAI

Twitter Delicious Facebook Digg Stumbleupon Favorites More

 
Design by Free WordPress Themes | Blogger Editing by Hasil Kopas - Premium Blogger Themes | Laundry Detergent Coupons